When I started this module, I had no existing knowledge what so ever of 3DS Max and now, I feel that I have learned more from this module than from any other one so far. The models that I have made I am very happy with and feel that they are to a high standard - I would not have changed anything in that respect. The animation I feel similarly about, however, had I had more time, I may have chosen to expand on it slightly to make it longer, or to make the special effects (fire, smoke, explosions etc.) look slightly better. However, considering that this is the first 3D animation that I have ever produced, I think the quality is very good. Managing to stick to my storyboard is something that has been achieved too - planning out the animation through the storyboard beforehand really helped the visual of the final animation.
My confidence has also increased a lot throughout this module. I now feel that I have the skills to make more models and short animations, and will continue to practice making models etc. over the summer.
If I could change something, it would be timekeeping. Although I allowed over a week for rendering, as I had heard rumours of how time consuming it can be, I would allow some more time next time, due to the amount of times that I had to re-render particularly big and detailed scenes, taking up several machines in the process.
Rendering was definitely the part of the module that I found the most difficult - the errors that were involved and the amount of time it took where I could do nothing else was quite stressful. However, the end result still came out looking good and luckily I had allowed some time to re-render in case things went wrong. The part that has been the most enjoyable for me was creating the models. Allowing my creative side to come out for the brief to design and make the models to be in my animation was very fun - particularly for the buildings and the scenery.
Overall, I have enjoyed this module very much and am looking forward to creating more models, more animation and learning new techniques next year.
Wednesday, 2 May 2012
Almost Finished

For (hopefully!) the final day of working on this animation, the final clip has been put into Adobe Premiere along with the background music that I am going to be using. The final clip has once again rendered only as one second long when it is meant to be much longer, so is being re-rendered over several workstations to hopefully take the strain off a bit, as it's a large file yet quite a short clip, but a vital part to my animation's story. The song chosen for the background music is the Halo 2 Theme by Steve Vai. This song has been chosen because the track begins being quite calm and fairly relaxed then suddenly gets very fast paced and crazy, which fits in well with how my animation goes. The song is going to be cropped down to the right time and fade out at the end, once the final clip has been put into the animation.
Tuesday, 1 May 2012
Using Adobe Premiere Pro

To combat the issue of not being able to view and edit my .avi files properly, the MAC operating system is being used instead of Windows.

Due to some rendering issues, parts of two particularly large scenes have had to be re-rendered in separate sections of about 200 frames each in order for them to work properly and not cut any bits out. Although the animation looks okay without these extra parts, as I have made them and am on track time wise I have decided to spend yet more time rendering them out to ensure that they are included, as I feel that then it will make my animation complete. These are being pieced together with other scenes in Adobe Premiere Pro, and I am trying my best to get them exactly on the right frame so that the video doesn't look choppy and glitchy in places. A plain black title screen with my SID no and the title of the production have been included at the beginning of the animation, and an ending screen which will be plain black when the tank flies into the camera.
The next step after all of these files have been pieced together properly will be to pick a song for the video, edit it if needs be and then add the final sound effects.
Final Scene

To finish off my animated short, the final scene includes an explosion while the tank is still spinning out of control and while the fire is still spreading to the barrels loaded with gunpowder. The tank flies at the camera and the scene ends with a black screen. Once again, one of my most valuable tools has been used: the super spray. This created the explosion, as the only other way I could find to create a decent looking explosion was using a plug-in, for which I don't feel familiar enough with to use yet (maybe something to try out over the summer ready for next year).
With this final scene finished, all that is left to do is render my scenes. I have been trying to render scenes as I go along, but I have had difficulty with this, so only one has come out successful (due to the machines hibernating when I've had to leave them unattended overnight or the program freezing and corrupting the render). I have decided on using HDTV 720 x 1280, uncompressed, default scanline renderer for every frame.
Once these renders have been finished, I will get the video finished in one session using Adobe Premiere on the Macs (I will do it in one session because as my files are so large, they have to be copied to the desktop to even play and then they still need to buffer to do so, so to save copying and pasting files each time I login, it would be preferable to just finish within one sitting). But until the files are completed, I will try and re-familiarise myself with Adobe Premiere Pro and look up the sound files and music to be accompanied with my video. Hopefully there will be no more rendering issues in the meantime!
Camera Path


Using a camera technique that was learned in one of our tutorial sessions, I have made the camera follow a path that the tank is following. When practicing this technique in lessons, it gave a roller coaster style effect, which I found to look very effective. In lessons, I found it quite difficult to get to grips with as the end result always looked too fast and jolting for my liking, but I have managed to get the timing and the camera angles to the right settings that I would like for this scene, without hopefully giving the viewer motion sickness! Using a camera with a more narrow depth of field I think has helped to make the difference with it this time.
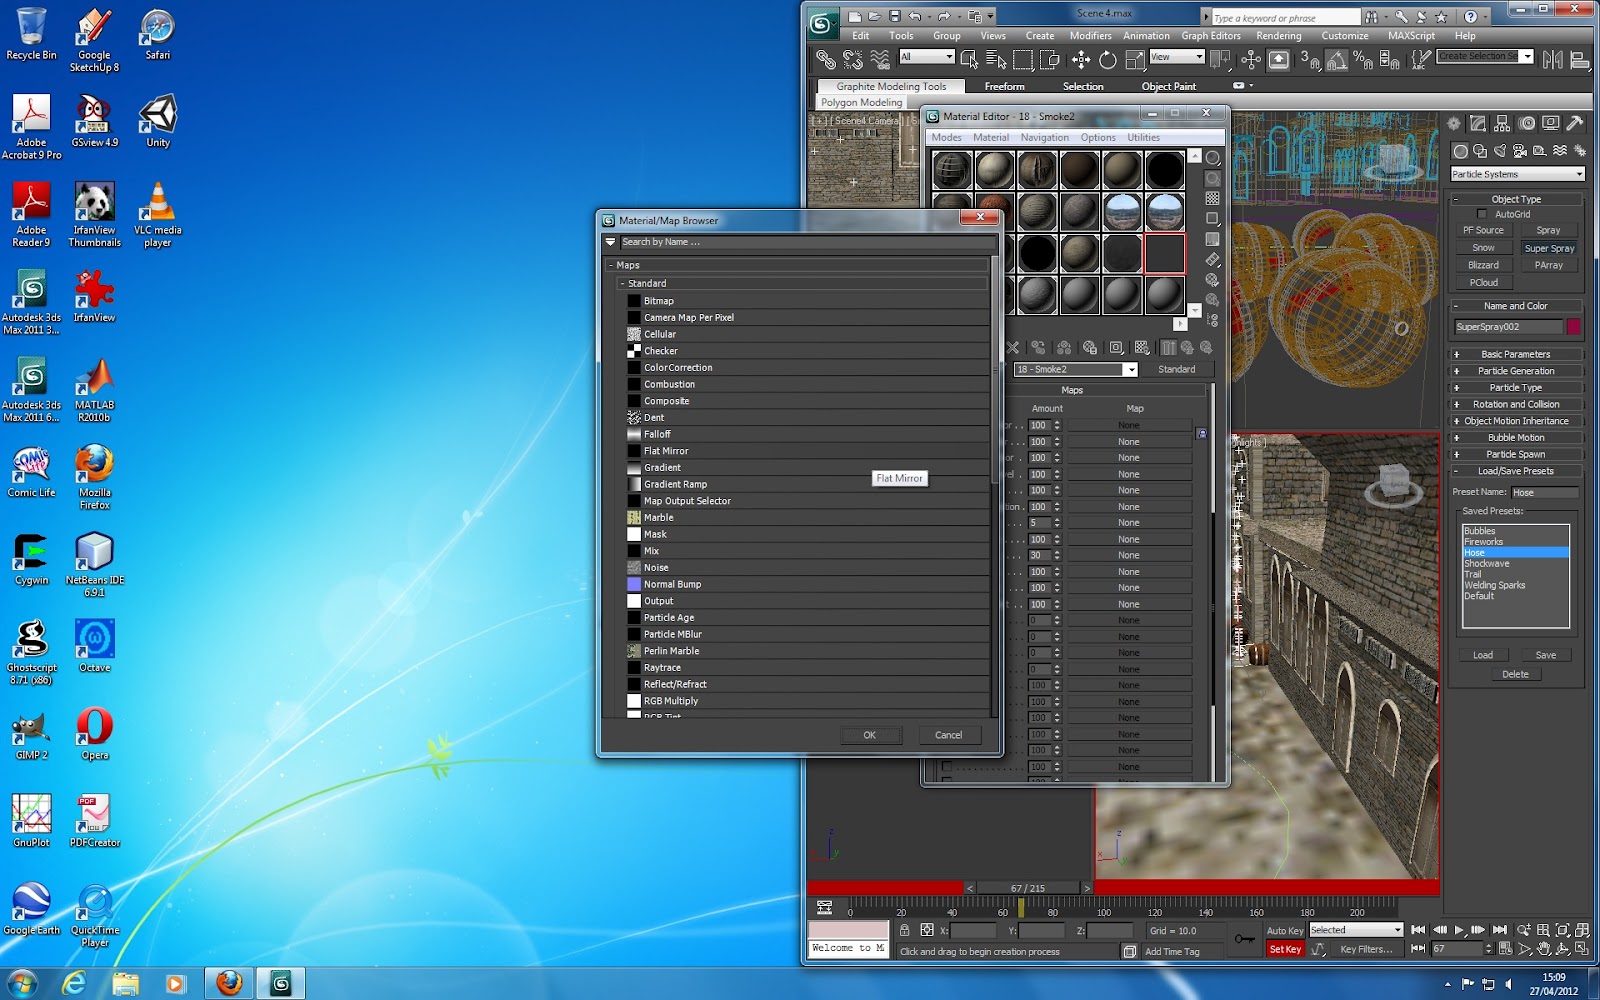
More Super Spray

To add some more flames and smoke in my next scene to show the fire spreading, more super sprays with mesh particles have been used. I have cloned the fire and smoke that was used for the first flame in my previous scene but adjusted the settings appropriately so that the fire is larger and looks like it is continuing to grow as it spreads. The same is with the smoke - it is proportional to the size of the fire that it is emerging out of. Once again facing particles have been used and the same materials as in the previous scenes.
Sunday, 29 April 2012
Creating Fire


The rotation and collision drop-down in the modify panel has had its settings slightly changed for the fire. Although I originally used an online tutorial to create smoke and to generally get the settings needed for the super spray, through making smoke a couple of times I have learnt what the settings are and how they effect the spray. So now that I am creating the fire, I have managed to guess by looking at the settings what digits roughly I need to input to get the desired effect.
For the rotation and collision tab, the variation option is particularly useful for fire. When playing through the fire on the timeline, each time the particles move and change, they never do so in exactly the same way, just like real fire. The particles also spin in 180 desgrees, once again adding realism to the fire.
The frame settings have been adjusted so that the fire starts growing when the smoke has been growing for a few frames, then it suddenly grows bigger and brighter. The amount of frames it grows for should be about 20, but this may be changed later, as well as when the fire ends.

To create the material for the fire, a face map and gradient has been used. This allows for multiple colours to be shown in the fire. Orange and yellow have been used because although many people think that fires have red parts, you can never really see red in a flame.
The texture has had it's glossiness decreased and its opacity increased and the diffuse colour changed. The diffuse setting has been set slightly higher as well.
The gradient type has also been adjusted to radial and noise has been added to make the fire look more realistic. These settings make the particles look more vivid and separated, instead of just a chunk of particles put together. Like when noise was added to the floor texture, the texture itself looks more rough and 3D.

Here is the final result of the fire when it gets going. It can be seen how the particles have been adjusted so that it looks more like the burning embers of a fire, compared to the smoke where the particles are more transparent and merge together.
Friday, 27 April 2012
Reactor

I have made the barrels fall in all different directions depending on where the tank impacts on the barrels. I have tried to vividly imagine this and have put a lot of thought into how the movement would look if it was really happening. The curve editor has helped with the visualisation too and has allowed me to get all of the movements more precise than just simply using the timeline.
The camera used is a 200mm, so that the view is very close-up of the tank and the barrels. However, because of how effective the barrels look when they fall and roll around on the ground, I may change the angle of the camera so that more of the scene can be captured. Although I chose a close-up front view for the storyboard, as it doesn't seem to show as much detail as I would like, I may change this later on when the smoke and fire have been completed.
Note: I call each different shot - as is seen in my storyboard - a scene because it is much easier to create all of the different camera shots in separate files, as well as minimising the program's crashing rate. It is also a lot easier during the rendering stage, as different machines can be used for each scene.
Thursday, 26 April 2012
Rendering Problems
I have been rendering the scenes as I go along and make them, on a seperate computer. When they are finished, the avi. file is not only laggy, but sometimes cuts out frames that I have definitely rendered. I have re-checked the renderer settings several times, changed minimal things, got help from peers and still the files aren't working properly. I am not the only one with this problem but as the end of semester grows nearer it is worrying that I may run out of time. So if anyone else who may read this has any suggestions please let me know.
Edit: Found out that running the files off the desktop is necessary due to the large file size. Even when importing into Premiere this needs to be done. However, have adjusted the render from mental ray to the standard scanline, as the files that I have rendered this way in HDTV 1280x720 have been less likely to be corrupt, as even some renders in the mental ray renderer have been corrupting.
Edit: Found out that running the files off the desktop is necessary due to the large file size. Even when importing into Premiere this needs to be done. However, have adjusted the render from mental ray to the standard scanline, as the files that I have rendered this way in HDTV 1280x720 have been less likely to be corrupt, as even some renders in the mental ray renderer have been corrupting.
Wednesday, 25 April 2012
Path Constraint

Particle Super Spray

To create the colours in the smoke, a gradient has been used to create three colours for the smoke to change, to show it thickening. The particle timining has been adjusted so that it appears and disappears in the frames that I want it to. The particle size has been increased and a particle pre-set used to get the desired effect.


Finalised Lighting


The lighting has finally been adjusted to what I want it to be. I discarded the daylight system, due to the washed out effect that it gave all my buildings, which erased all of the detail of the texturing. It has been replaced with an omni light, which is positioned high above the scenery, like the sun would be at about midday. To create some softer shadows, another omni light has been included just behind the camera to give the other buildings some more light and to dull down some of the harsher shadows.
There was some problems with the lighting where the floor was concerned: the floor was either appearing washed out or was not being illuminated at all - just replaced with the background colour. To combat this issue, the floor was re-made and scaled down, with some extra noise added to create bumps and make it look more realistic and un-even.
I started off using just a skylight at a high point in the sky above the scene to be seen as a sun, but this did not give the type of overcast conditions that I was looking for and for a standard 12pm day in the summer, so the omni lights were tested and gave the desired effect.
Thursday, 19 April 2012
Rendering
I have tried rendering my scene so far, just to see what it looks like, and for only 180 frames it is taking a very long time, compared to the modelling part, to render. Because of this, I am going to speed up the amount of time left to animate and try to leave a week for rendering alone. To hopefully make the process a bit quicker, I will render the scenes seperately (maybe 100 frames at a time in the range panel) then save them with appropriate names, so that they can then be pieced together in Adobe Premiere or After Effects. This will not only save time, but as the labs in university aren't open all the time, this seems to be the only way for me to do the scene.
Tuesday, 17 April 2012
Camera Movement

The camera is being viewed in the top left-hand view, so that it can be seen what the scene looks like through the camera lens. I have started off with a high angled shot, which sweeps down to a long, straight-on shot by frame 150, then zooms in slightly on the next 20 or so frames, which is when the relevant movemnt will begin.
As I currently have a good visual in my mind of how the cameras are going to work (I thought it out quite thoroughly in my mind during the pre-production stage, mainly when the storyboard was being created), but if I find that it is needed later on, I will write or draw what camera angles and movements need to be used to give the effects that I want for the scene.
When I begin to animate the tank, to get more of an idea of how the tank moves usually, I have been watching videos on youtube to try and see which parts move how, so that when the tank spirals out of control later on I can make it as historically accurate as possible. One useful one that I have found today is from Assassins Creed Brotherhood:
http://www.youtube.com/watch?v=Txb6haeNvgc
It helps that I have played the game, but with never really analysing how the tank moves, I can now look at videos to remind myself. To animate this, I have been grouping and ungrouping sections of the tank so that when it needs to be animated, if certain parts just need to be adjusted, it can easily be done using this tool.
Lighting Adjustments

For now, what I have done is adjusted the self-illumination of my textures that provide the background imagery. As these are simply background images, that shouldn't be affected by my lighting anyway, under the self-illumination tab on the material editor, I have raised the colour to 100. This way, these parts no longer need to be worried about for affecting the lighting of the rest of the scene, such as when one side is covered in shadow.
I will continue to do some research into lighting techniques so that when the animation is complete, I can make the lighting as realistic as possible, but still with detail. I have been reading some books over the break about 3DS Max animation and cameras in general, so I will now continue onto lighting, as I feel this to be one of my weaknesses at the moment in the program.
Wednesday, 28 March 2012
My Completed Scenery


This is three different views from my draft renders of the scene. This is using the standard draft rendering and with the standard sunlight and skylight settings applied, with the times and date as mentioned before. The render shots show the different views of the scenery and the objects contained within them. I may adjust the lighting more slightly as I'm not 100% happy with the shadows and how the buildings look less detailed with different tones, as well as the texture of the floor appearing virtually non-existant.
Lighting Decisions


Assembly

Inserting Other Models Into The Scene

One problem I have found when merging existing models into a scene is that the textures can sometimes be a problem. As in the screenshot above, I have inserted the barrels that I have made into the scene with textures already applied, yet they do not appear to be there. They appear when I am rendering the scene, but if I decide that I need to change one slightly, I cannot do so without the materials being present in the material editor. Also, as rendering is now taking a few minutes for the scene rather than a few seconds, it is more time efficient that I can actually see the materials on my objects, rather than having to render each time to see the effects.

Monday, 26 March 2012
Problem Solving
Now that my scenery has progressed and I have begun to merge all of my models together and increase the detail of them, my home laptop has decided that it can no longer cope. While doing some work, the program decided to crash (2011 32-bit version) due to the amount of polys etc. that are now being used. So now I am slightly more limited in where I can do my work, and even some of the computers in the labs are going slower than usual. Because of this, I am saving at least a week at the end of the semester for rendering my final animation, and am going to ensure that I get the majority of the modelling and animating done by the end of the easter break, then do all of the blogging after. This way, hopefully any further problems that I encounter, due to the program not being able to cope/crashing and losing some of my work, will be rectified. I will also ensure from now on to back up every single time that something gets changed, and to keep multiple back-ups of my work incase one of them becomes corrupted.
Wednesday, 21 March 2012
More Buildings

Constructing my scene so far is going well. I have noticed the program getting slower, so am expecting to encounter some crashing in the near future, maybe due to the amount of polys and vertexes that are now being used, from the detail on all the buildings and the background combined. Although I have only been cloning and re-arranging the set of the buildings that I have recently developed, the scene I feel is still looking quite impressive and what I planned it out in my storyboard and other sketches to look like. I will continue to develop this further by adjusting the lighting, importing other features into the scene and possibly adding some other features to the street if I deem that necessary later on (I will look at some more pictures of streets in Venice from the 15th century to see what things there normally were).
Adding The Background


Floor Texturing

Tuesday, 20 March 2012
Textures
Have found a very good site for the kind of textures that could be used in my animation. Some of them are similar to the style that I am using and would fit in very well with scenery of the time era that I am looking at.
For my own reference, in case I lose the link:
http://www.mb3d.co.uk/mb3d/maxTextures_Home_-_Free_Seamless_and_Tileable_High_Res_Textures.html
For my own reference, in case I lose the link:
http://www.mb3d.co.uk/mb3d/maxTextures_Home_-_Free_Seamless_and_Tileable_High_Res_Textures.html
SWOT Analysis
SWOT Analysis of my work so far:
Strengths
Weaknesses
Opportunities
Threats
Strengths
- Can stick to deadlines and am keeping good progress so far.
- When work needs to be done, I will do it and sacrifice other things to do so.
- Bit of a perfectionist.
- Keen eye for detail.
- Have some good models so far as a good basis for the animation.
- I am enthusiastic about 3D animation and am enjoying it immensely, which makes the work a lot easier.
- Am now familiar with 3DS Max's interface and with many of the tools used.
- Good mark from the first part of the assignment, which I am very pleased with!
Weaknesses
- Tend to focus on one particular module above others (good for this module but not so good for keeping the workflow up to date with the others - it'll catch up with me eventually).
- Have used 3D Max so far mainly for modelling, so not as confident with animation.
- Only animation that I have done so far has been 2D and in Flash.
- Pressure to keep up with the high grade from the first assignment so that I can still keep an A grade.
- Rendering time will be longer for animating, so need to leave some extra time at the end to allow for this.
Opportunities
- Learning how to use a program that is used in the industry to create 3D models and animation.
- Have learnt a variety of modelling, animation, design and texturing techniques: covering a wide area for future career choices and having all of this available to show at potential job opportunities.
- Am now familiar with the 3DS Max interface.
- Growth in confidence with creating 3D - especially with modelling.
- A program that I enjoy using.
- A new possible career, as I feel that I am good at 3D modelling and really enjoy it.
Threats
- The job market: when coming out of uni will there be many jobs relating to 3D available?
- Stress from work overload.
- All of my back-ups somehow being destroyed.
- The program crashing and losing some of my work.
- Not keeping up to date with everything.
First Finished Set of Buildings

Rear View

The screenshots above show the completed buildings for one side of the street where my animation is going to take place. Upon viewing the screenshots, I am debating whether to make the gap between some of the buildings slightly smaller, in case it proves a problem later on when the tank is viewing around and seeing the rest of the scenery. For the other side of the street and at one end of the street (as the animation will only be shot from one end, there will be no need to include buildings at the other end too) I will be cloning the buildings and re-arranging them, so that I don't have to spend more time modelling, but the re-arrangement is so that it isn't completely obvious to the audience that the buildings have been cloned.
Further Progression of Modelling

Another problem that I encountered today was in the material editor. All of the locations of the bitmaps for my materials could not be found, so I had to re-locate all of these for the main bitmap and for the bump bitmap, so that all of the materials look the same as before.

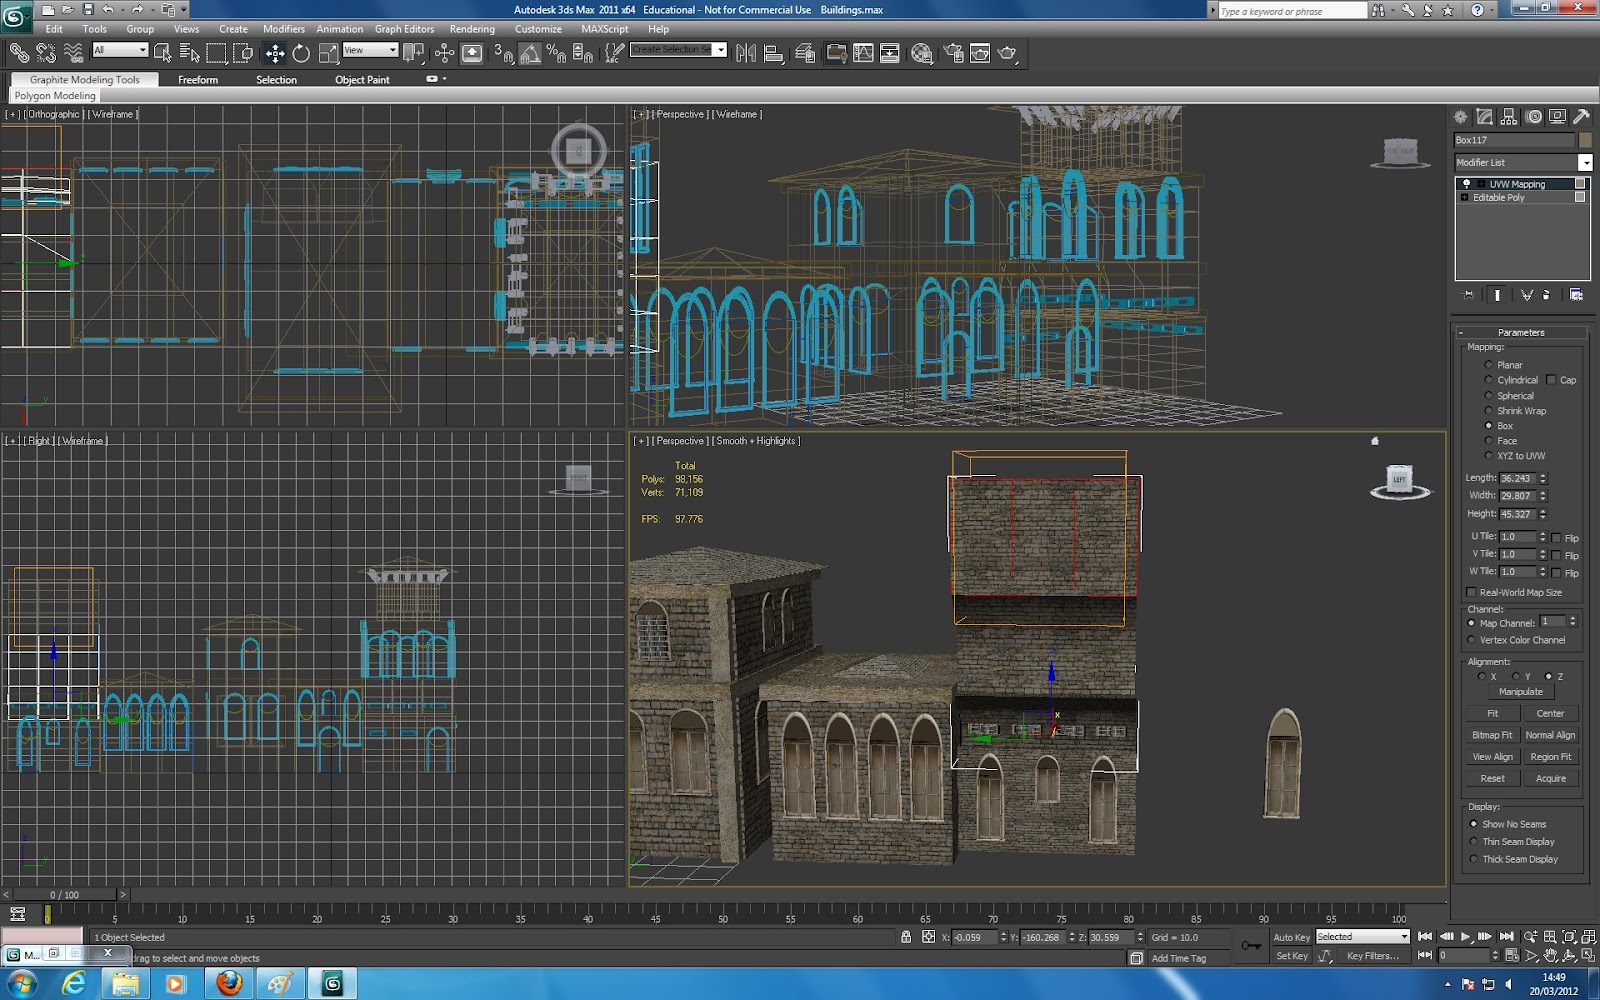
My next task has been too adjust the brickwork so that all the different boxes and other shapes that I have made are consistent with each other in terms of textures. As some of the brickwork has been coming up slightly different sizes, I have made note of the exact measurements of length, width and height and am inputting the numbers to the needed sections, using the UVW Mapping tool. The majority of the mapping has been using box mapping, but certain parts have required the alignment to be changed. Although this detail may not be the most noticeable thing during the animation, I would prefer it all to be correct to make the animation seem more realistic.

For the brickwork on some of the roofs, UVW Mapping has once again been applied, but the parameters have been changed so that there is no distorting the image. Also, Cylindrical Mapping has been used so that the brickwork is in the right position, rather than all of the bricks simply going in the same direction. I may look for some more slightly varied brick textures for the roofs, however, the problems that I found before were either that the angle the photo was taken was not efficient to create a texture from, of that the image was watermarked and required a payment to get the un-watermarked image. If this is the case again, I can edit the existing images that I have in Photoshop, just to vary the texture and colour settings slightly.
Reactor


Wednesday, 14 March 2012
Modelling The Scenery

Progression of Town
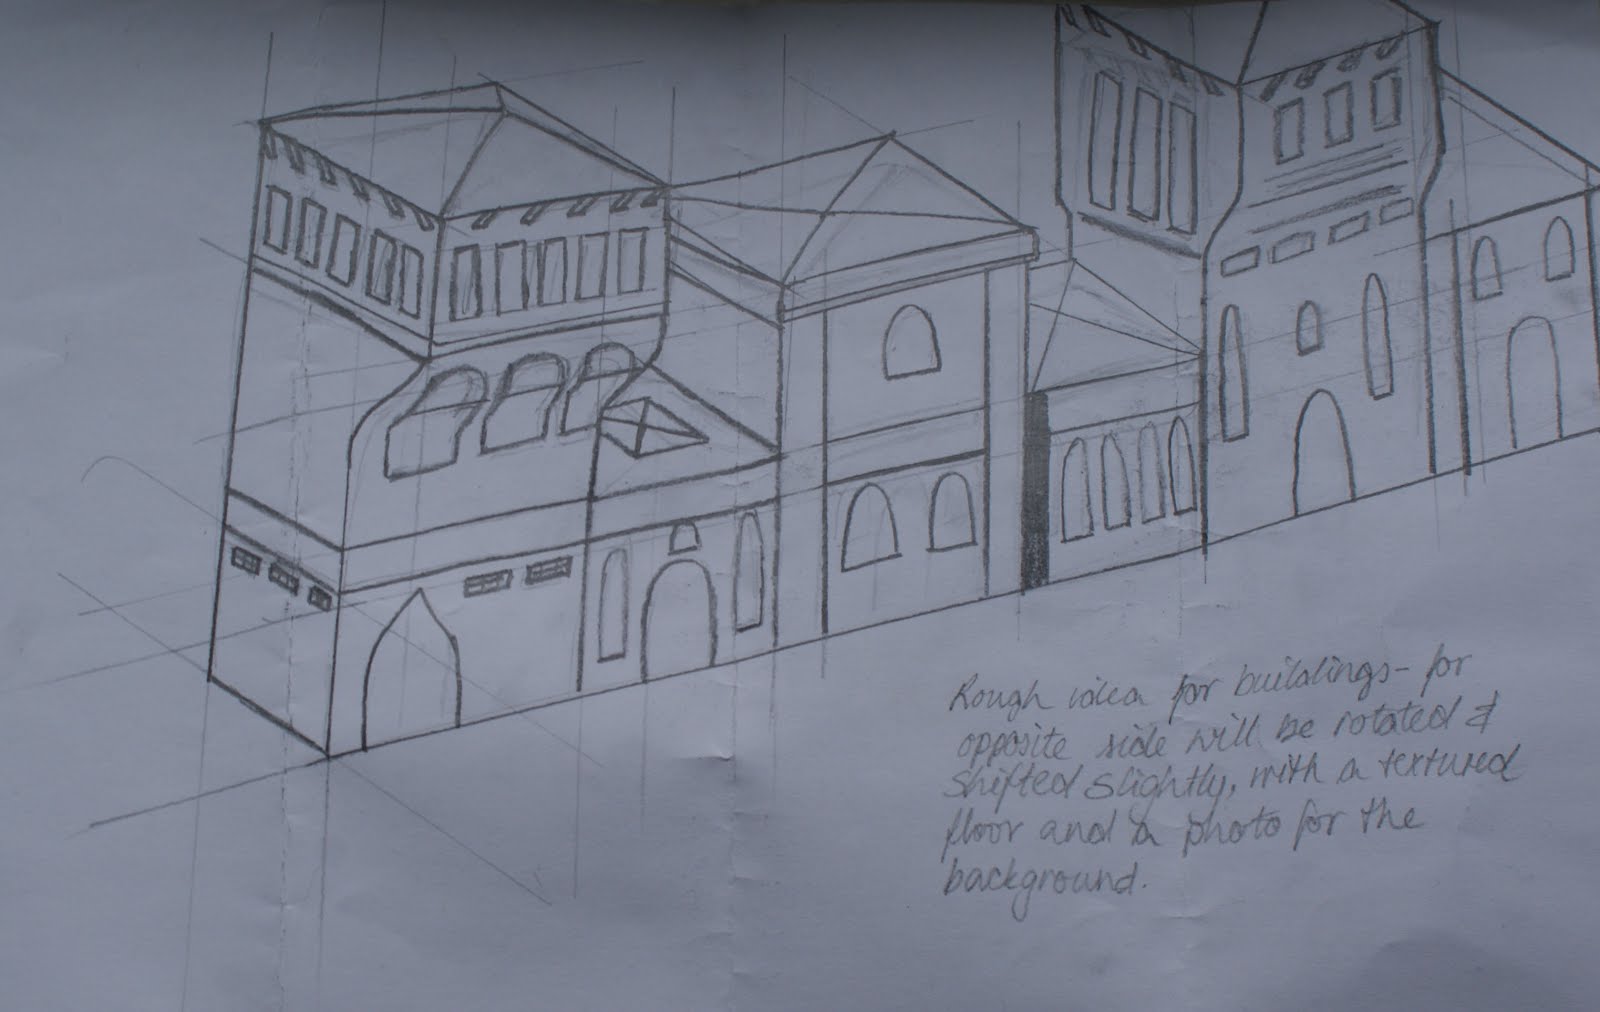 For the scenery in my animation, I am needing to expand on my model of three buildings. The sketch above shows the rough plan that I am going to use to make the rest of these buildings. All of the buildings are going to have very similar brickwork and features, as many of the buildings from this time period were very similar. However, to be more creative than simply cloning the three buildings that I have already made, I am going to use features (e.g. windows, shapes etc.) and mix and match them together to make a set of new connecting buildings. I aim to have them look similar to the sketch above, then this set will be cloned/rotated/shifted around slightly for the other side of the street in which my production will take place. I will then use some more of these buildings, if needed, for the background of my animation, depending on how the camera looks. I will also find a decent texture to use for the brickwork on the floor, and a photo or two for the background.
Tuesday, 13 March 2012
Morpher


Today, we learnt how to use the morpher tool. Starting off, we had a model of a basic human head, which was then converted into an additional poly and cloned (as a copy) three more times. Using the polygon selector, the bottom part of the mouth was selected. Then, using the grow tool in the editable poly menu, the rest of the lower jaw was selected. This could then be moved to make the mouth more open. I renamed each of the heads according to what was going to affect them, which was an open mouth, closed eyes and raised brows. Once all of these had been edited, the morpher tool was then applied. This was firstly applied to the original head, with the slots being filled with the other heads and how much was adjusted.

This was then smoothed using the turbo smooth, to make it look more shaped like a head, and then the auto key was enabled to begin animating. The only problem with animating is that on the timeline, we cannot see which feature is being animated, as all of the keys are the same colour. To combat this, the curve editor is opened and all of the different movements can be seen and adjusted seperately. For the animation, I made a short clip of 100 frames showing a person opening their eyes and mouth, then closing them again as they raise their brow - a bit like someone starting to wake up in the morning. To ensure that the animation is fluid, I made sure that all of the movement settings on the first and last frame of the animation were exactly the same.
Subscribe to:
Posts (Atom)